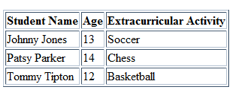
In the early days of the Internet, programmers and designers tried to use HTML to add style and formatting to their web pages. They were never very successful because HTML was designed to control the layout and structure of web pages, not to make them look attractive. Eventually, Cascading Style Sheets were developed to control the style and formatting of pages. Just learning a few CSS styles can go a long way in making your web pages more presentable. Let’s take a closer look at how you can use styles to drastically improve the look of HTML tables. We’ll start with this plain and boring HTML table:
Step 1 – Add a
Step 2 – We’ll use an id selector to apply styles to the table. To do this, we need to add the id to the table tag. Change the
Step 3 – Now we’ll create the “csstable” styles within the style tag. Put the code below inside the style tag and read the comment lines that start with “//” to understand what each row does.
the #csstable tells the browser to look for an element with id=”csstable”and apply the styles to it
#csstable {
//creates a thin, solid blue border around the outside of the table
border: 1px solid #89DEFF;
//removes the spaces between the table cells
border-collapse: collapse;
}
special styles for the elements in the table |
#csstable th {
//sets the background color to blue
background-color: #B2DCED;
//creates 5 pixels of space between the content and the borders of the table cells
padding: 5px;
}
special styles for the elements in the table |
#csstable td {
//creates 5 pixels of space between the content and the borders of the table cells
padding: 5px;
//creates a thin, solid blue border around each table cell
border: 1px solid #B2DCED;
}
Step 4 – Now let’s add one more style to make every other row in the table have a colored background. We’ll use a CSS class selector for this. Add the following rows inside the tags.
.shadedrow {
background-color: #EBF9FF;
}
Step 5 – Now add a “shadedrow” class to the table row tags for any rows you want to have a background color:
The final result with CSS added.
Your HTML table should now be colored and spaced like the example above. When you are comfortable with the styles covered in this tutorial, it will be easy to branch out and try other styles on your web pages. CSS makes web content stand out, so take the time to learn how to use it to your advantage!
If you've any question, problem, suggestion and feedback than please comment below.
Have a nice day!
Popular posts from this blog
Tables are required in documents for presenting data and other information in an organized and easily comprehensible manner. In this tutorial, you will learn how to create, modify and delete a table in MS Word. Task Start a new MS Word document and do the following: 1. Create an 5x8 table (i.e. a table with 5 columns and 8 rows) and enter numbers from 1 to 40 as shown below: 2. Delete the last row and last column of the table to make it a 4x7 table. 3. Insert a new row below the third row. 4. Insert a new column to the left of the second column. 5. Split the table into a 5x3 table and a 5x5 table. 6. Delete the 5x3 table. Step-by-step Instructions Start a new document by clicking the MS Word icon on the Windows Task Bar or the Windows start menu. Task-1: Creating a Table Click ‘Insert’ tab. Click the ‘Table’ button. A drop-down menu will open showing a table grid and a few other options (see Figure 1). To create an 8x5 table, two alterna...
A table is made up of several cells. These cells can be formatted in order to improve the readability of data. Cells of a table created in Microsoft Word can be merged, split and shaded. You can put borders around the cells, change their height and width and change the alignment of text contained within the cells. In this tutorial, you will learn how to format cells of a MS Word table. Task Download the MS Word file titled “Formatting Table Cells” . The document has the following table displaying the marks obtained by three students : Perform following tasks on this table: The three columns below “Marks Obtained” are actually its sub-columns. Hence, the “Marks Obtained” column should span the three sub columns. To do this, merge the “Marks Obtained” cell with the two cells at its right and centre the text in the merged cell. There is a blank cell below the cell containing “Student”. Merge this cell with the “Student” cell and centre the text vertical...
Most documents, if not all, require the pages to be numbered. Microsoft Word provides page numbering functionality through a number of pre-formatted page numbering styles that impart a professional look to the document. Page numbers are generally inserted either in the header or the footer of document pages. In this tutorial, you will learn how to insert page numbers in MS Word documents. Task Download and open the practice document “Alice’s Adventures in Wonderland” from the About Tutorials page. In this document: Insert page numbers in the centre of the footer in the format “page x of y”, Remove page numbering from the document, Insert page numbers in the left and right margins of the document. Step-by-step Instructions Task-1: Inserting Page Numbers in the Footer Figure 1: Page Numbering Menu Click ‘Insert’ tab on the Ribbon. Click the ‘Page Number’ button in the ‘Header & Footer’ group. A drop-down menu will open showing options for page...
Comments
Post a Comment